Auditorium Quick Set
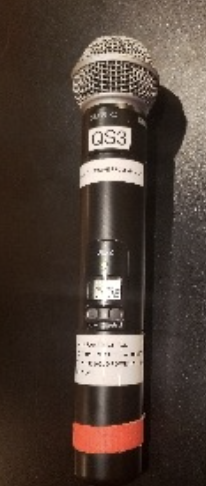
The MNMS Auditorium QUICK SET system has the availability of 4 microphones:
2 wireless handheld microphones
1 wired microphone
1 podium (gooseneck) microphone
Using 4+ microphones will require the use of the MIDAS console located in the booth of the auditorium.
| Tip |
|---|
Please contact IT services for additional microphone requests. |
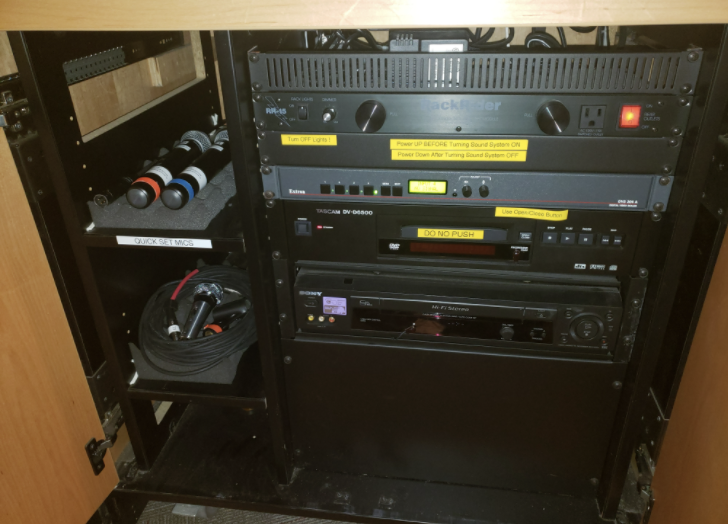
Turning on Audio Power
Locate the tall black tower in the booth of the auditorium
Tower
Turn the tower on by pushing the white Main Power button
Push the toggle switch under the power button to the left towards Quick Setup Mixer
Power Switch
| Note |
|---|
Be sure to check the display in the window to ensure it says MNMSQuickSetup |
Using the Projector and Screen
Locate the tall black tower in the booth of the auditorium
Turn the power on by pushing the white Main Power button
Push the toggle switch under the power button to the left towards Quick Setup Mixer (make sure screen says MNMSQuickSetup)
Open bottom doors of the podium - push, RED toggle switch to the ON position
Push the ON button located on the podium console under PROJECTOR

Select the input source on the podium console that you'll be using by doing the following:
Select LAPTOP to connect your laptop
Connect your laptop using the cable located in the pocket on the right side of the podium desk to your laptop
Connect the sound cable to your laptop's headphone jack if your presentation requires sound
Select VCR or DVD if you are playing a video using a media player located in the bottom of the podium (see Example 3)
Press the power button for the desired media player
Insert DVD or VHS, and control the media from the player itself
Push the OFF button on the podium console under PROJECTOR to power off the projector when you are finished
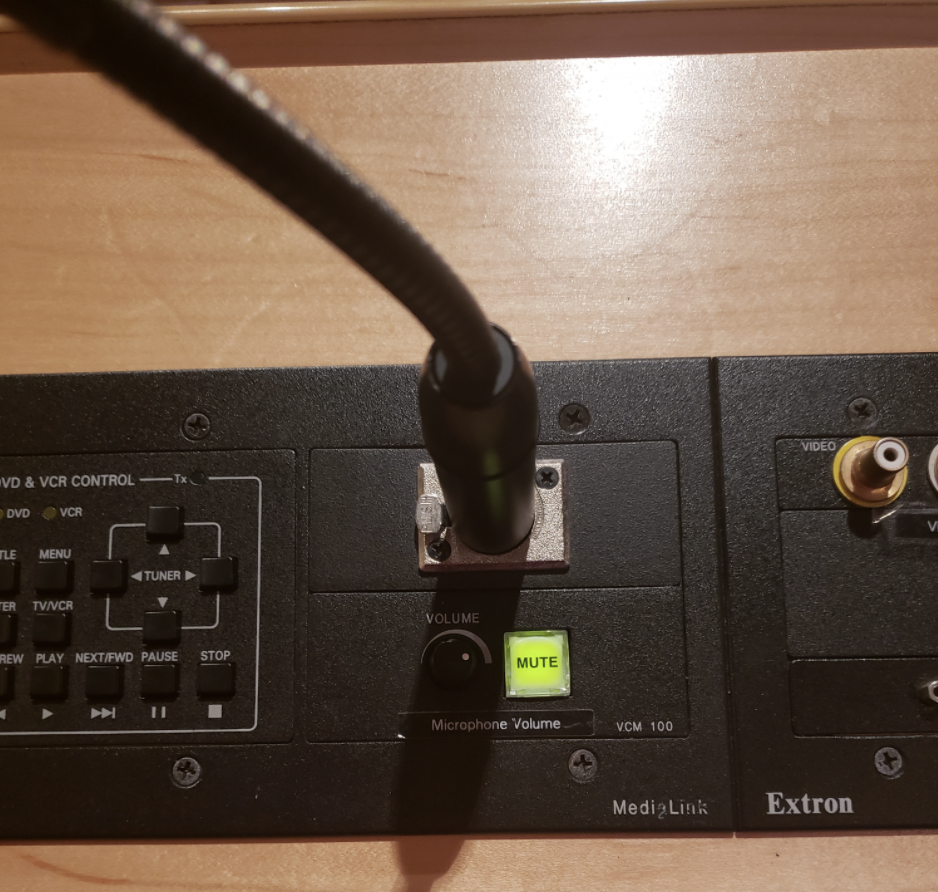
Using the Microphones
| Info |
|---|
|
| Expand | ||
|---|---|---|
| ||
 |
| Expand | ||
|---|---|---|
| ||
  |
| Expand | ||
|---|---|---|
| ||
 |
Using the Lights
| Note |
|---|
Important info regarding the MN Auditorium Lights The following are instructions for basic House Lighting of the MN Auditorium. This will be adequate for basic presentations, meetings and/or events using the projector. More intricate lighting; including colors and special lighting features will require the assistance of IT Services. |

| Info |
|---|
There are FOUR entrance button stations located at each exit of the auditorium. |
Push Top Button at one of the four auditorium entrances to turn on all house lights. The lights will fade up slowly (approx. 4 seconds).
Push the Bottom Button at one of the four entrances to turn off all house lights. The lights will fade down slowly (approx. 4 seconds).
MASTER CONTROL PANEL
There is a Master Control Panellocated on the wall on Stage Right. This will actually be the LEFT side stage wall as you're looking at the stage (Inside the light blue metal enclosure).
This panel can be used to create your desired lighting scene. You can mix the sliders however you would like for your concert or presentation. The higher you place a slider, the brighter those lights will be.
| Info |
|---|
The Sliders will NOT work until you turn off the house lights by pressing the button on the bottom left of this panel. The ON and OFF buttons on the right turn on the Mercury Vapor lights in the house. You’ll see them slowly turning on. This creates a bright white light in the house. |

SLIDER 1 - All HOUSE Lighting in the seating area of the auditorium
SLIDER 2 - Sconces ONLY in the seating area of the auditorium
SLIDER 3 - No Screen scene. Use this to light the stage in front of the curtain for projection.
SLIDER 4 - Podium lighting
SLIDER 5 - Stage wash lighting
SLIDER 6 - Front of house lighting
| Note |
|---|
IMPORTANT - SLIDERS MUST ALL BE PUSHED BACK DOWN IN ORDER TO GAIN CONTROL OF THE 4 ENTRANCE BUTTON STATIONS AGAIN. THE SLIDERS TAKE PRIORITY OVER THE ENTRANCE BUTTON STATIONS. |
Related Articles
| Page Properties | ||
|---|---|---|
| ||
|
| Filter by label (Content by label) | ||||||||||||
|---|---|---|---|---|---|---|---|---|---|---|---|---|
|